The Land of Dragons
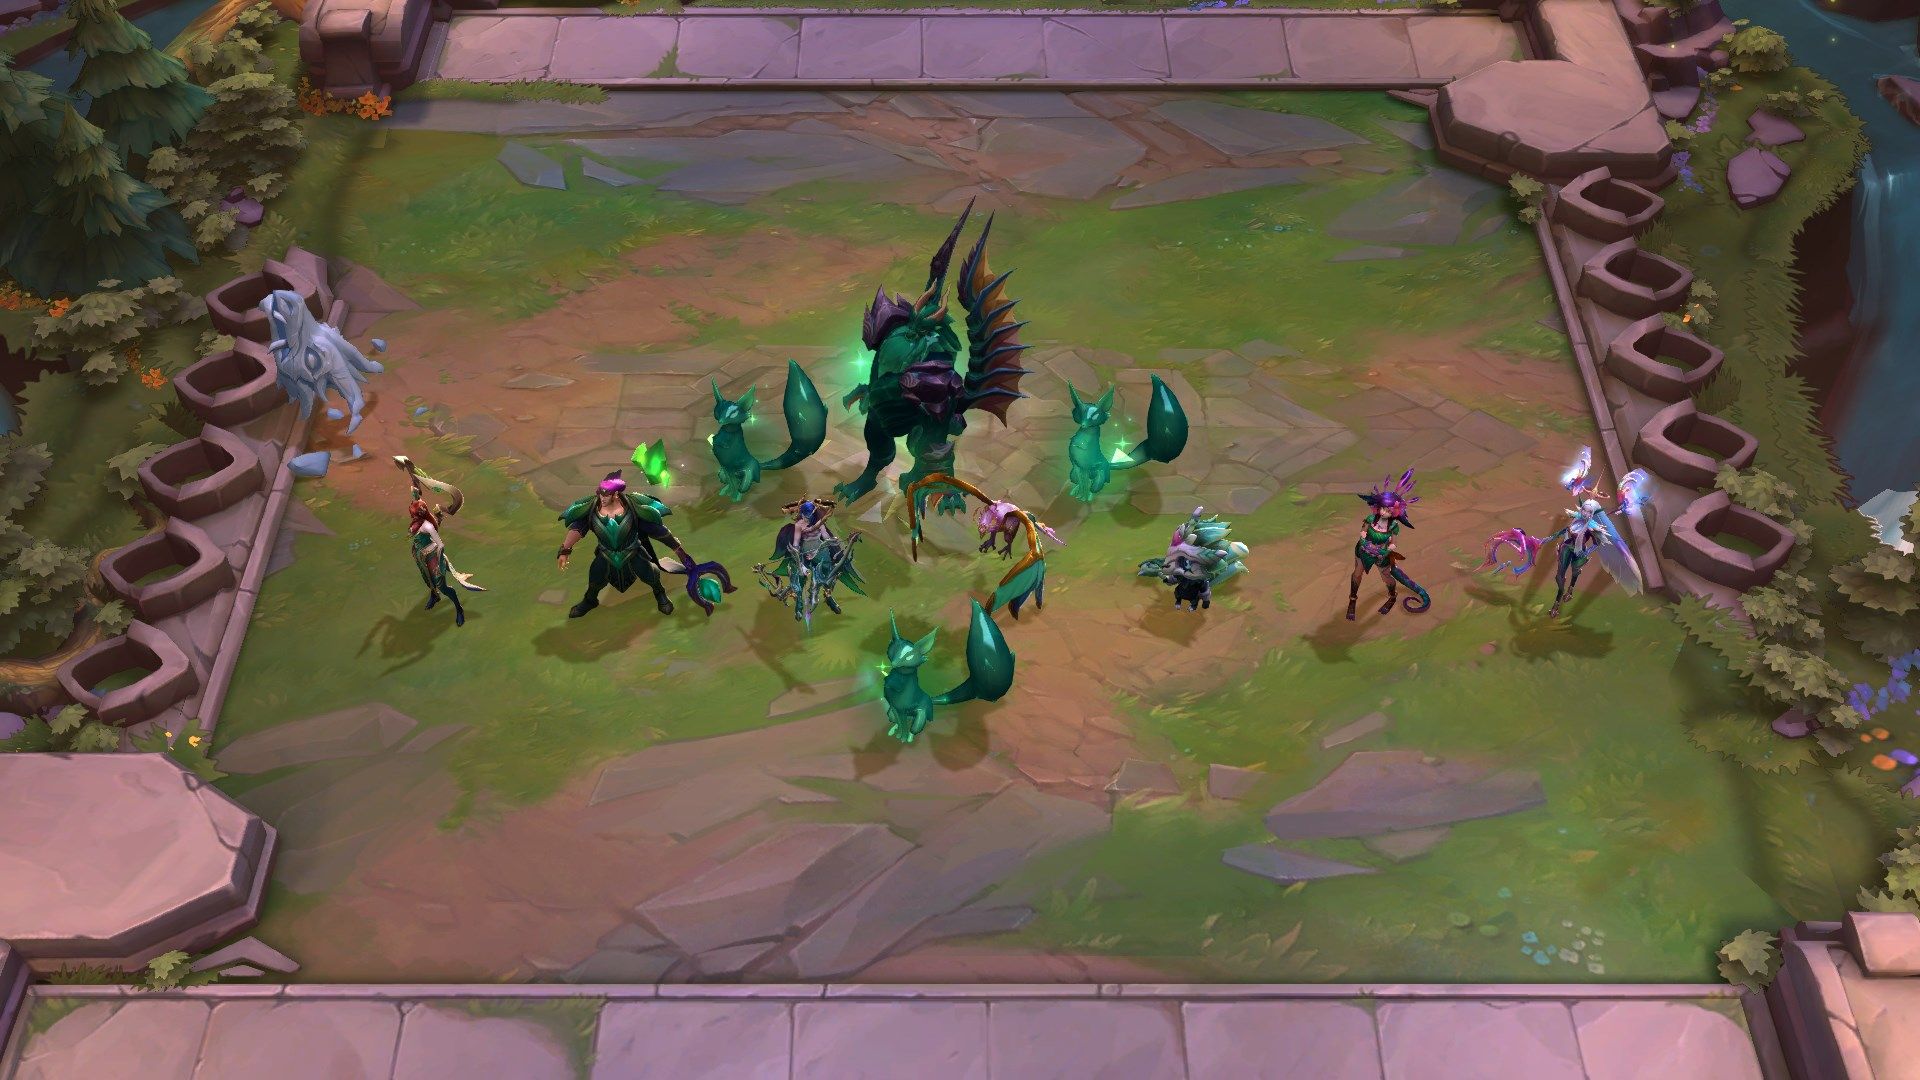
The Dragonlands are an archipelago, where each island hosts different biomes, critters, dragons, and champions.
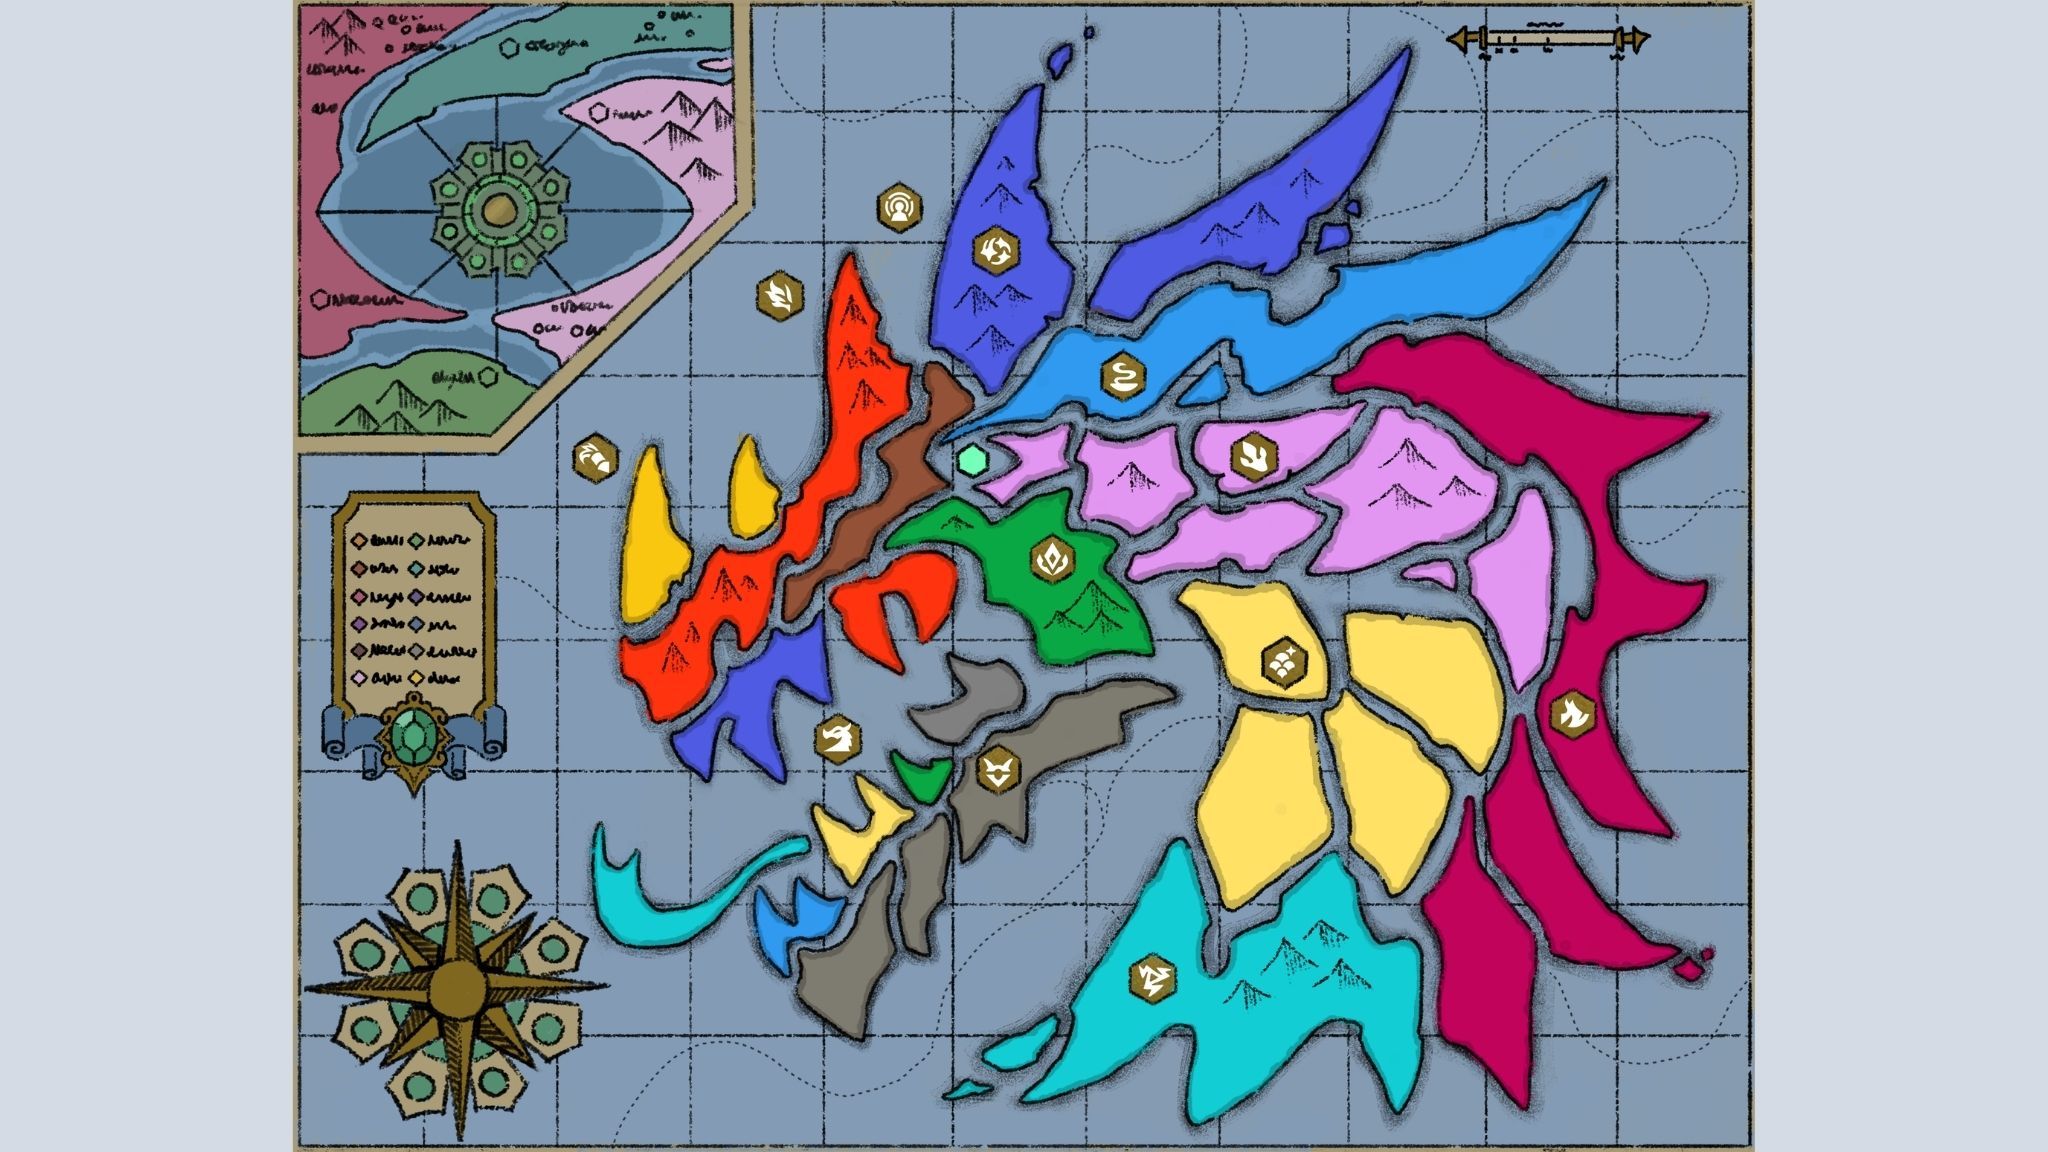
Whether you find yourself in the myriad of oases that dot the Jade region, the lava scarred gorges of the Ragewing, or the elusive valleys where Shimmerstone grows from the ground in Shimmerscale, expect to find dragons each as different as their respective homes.
But not all regions are home to dragons—some have balked in the scaled face of power forcing dragons to flee their regions. Scalesworn, Revel, and Guild have no need for Dragons, using their own ferocity, firecracker “technology,” or sheer talent of craft to thrive in this world. We’ll get into some of those traits a bit later, but for now let’s take flight with DRAGONS!
The Dragon Trait
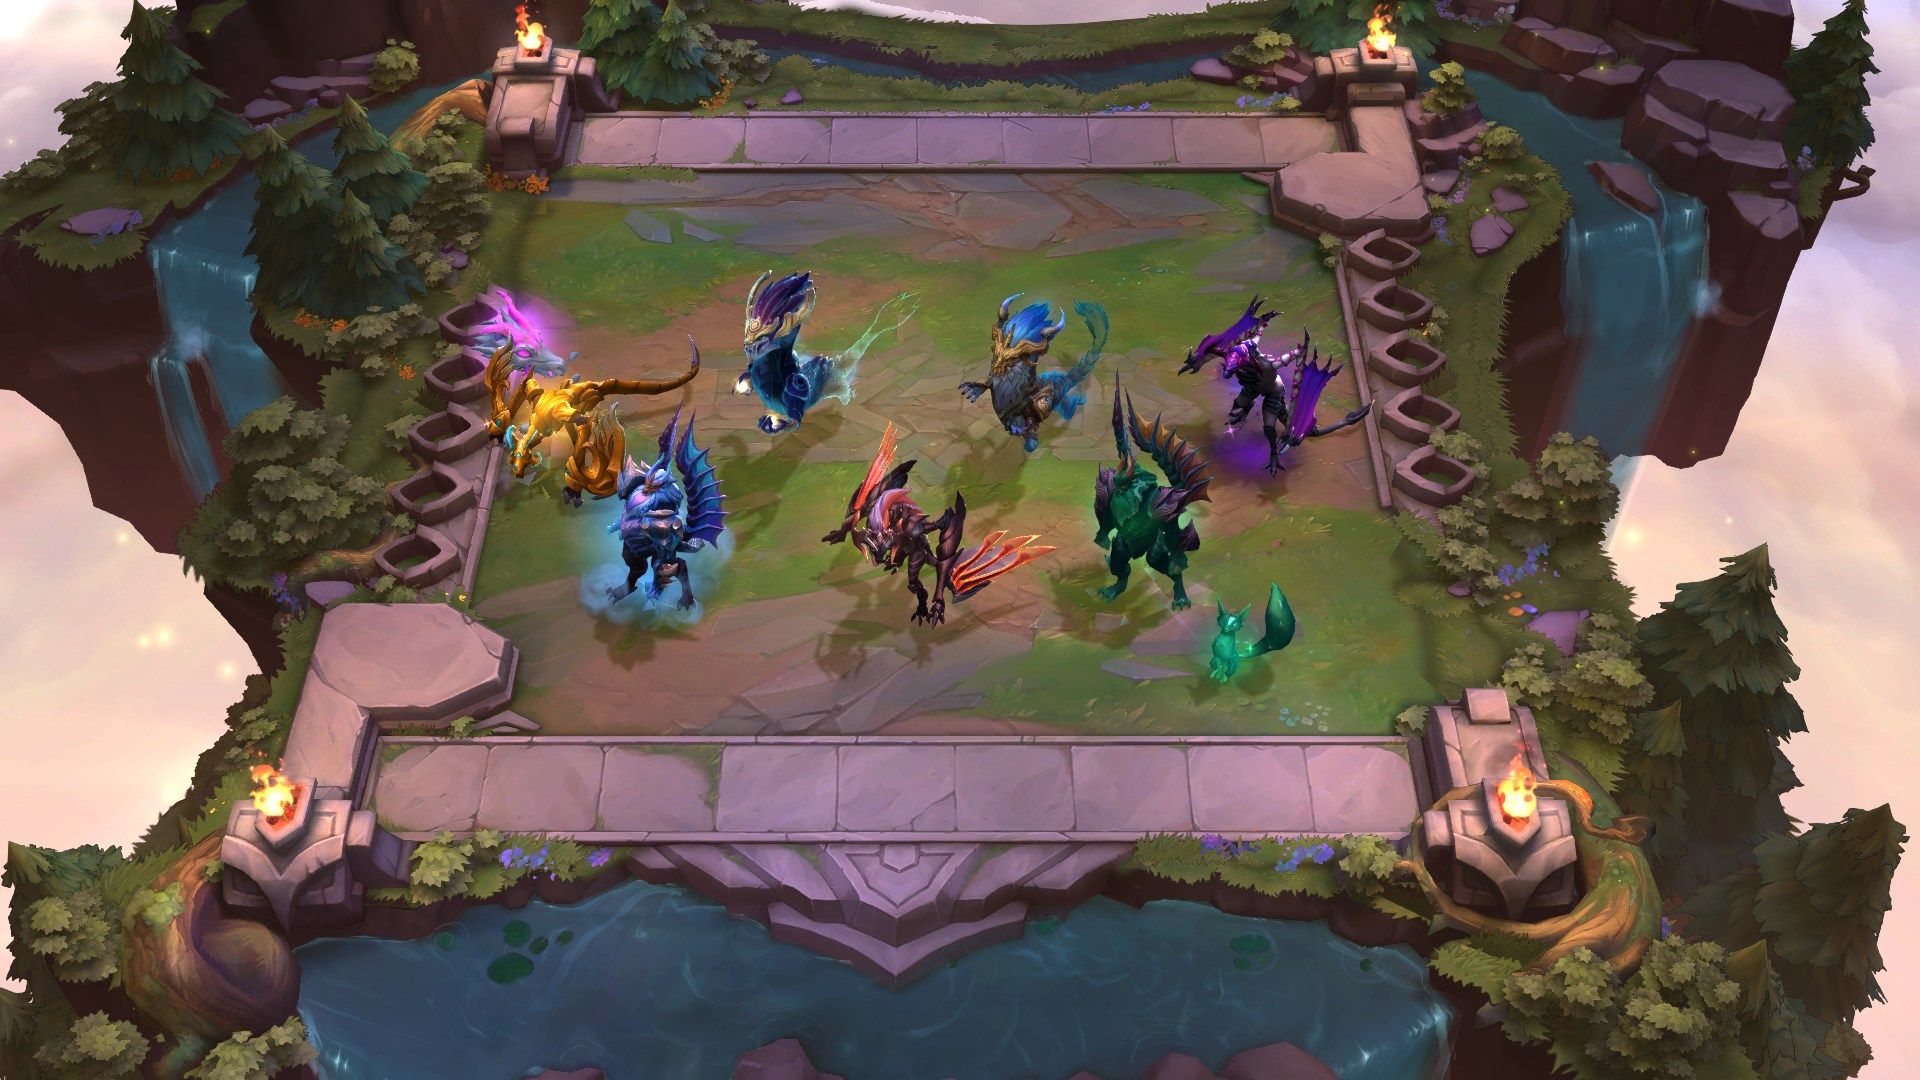
The Ancient Dragons of the Dragonlands take on a new origin with the Dragon Trait. They count as two units in your army, have a bunch of bonus health, are double the cost of other units in their rarity tier, count for triple their trait bonus, and are super powerful. With Dragons leading your comp to battle you’ll be able to hit create powerful trait combinations and devastate your foes’ board.
Because they do SO much, we’ve actually covered them in our Mechanics Overview article, where we even dive into three of the seven Ancient Dragons in greater detail: Shyvana, Ao Shin, and Aurelion Sol.
As for this article, we’ll check out more of the game-changing Dragon units when we dive into their traits. But first, a list of the Ancient Dragon units taking over the Convergence:
- Daeja: Tier 4, 8-cost, Mirage
- Idas: Tier 4, 8-cost, Shimmerscale, Guardian
- Shi Oh Yu: Tier 4, 8-cost Jade, Mystic
- Shyvana: Tier 5, 10-cost Ragewing Shapeshifter
- Sy’fen: Tier 4, 8-cost, Whispers, Bruiser
- Ao Shin: Tier 5, 10-cost, Tempest
- Aurelion Sol: Tier 5, 10-cost, Astral, Evoker
Shimmerscale
If gold moves everything around you, including your items, then Shimmerscale is the trait for you. Shimmerscale grants the player the use of exclusive gold-powered Shimmerscale items. Higher tiers (3,5,7,9) unlock more items, and the order the items are granted changes every game.
- Aatrox: Tier 1 Warrior
- Kayn: Tier 2 Ragewing, Assassin
- Volibear: Tier 3 Dragonmancer, Legend
- Idas: Tier 4, 8-cost, Dragon, Guardian
- Zoe: Tier 5 Mage, Spell-Thief

There are seven total Shimmerscale items. Let’s take a look at a few of them:

Draven’s Axe
- Draven’s Axe: Gain 1 Attack Damage per gold in your bank (up to 80). Every attack, this item gains 1 stack. At 100 stacks, gain 10 gold and 1 item component.
- Goldmancer’s Staff: Gain 1 Ability Power per gold in your bank (up to 80) and a 40% chance to drop 2 gold on enemy kill.
- Determined Investor: After the holder dies 8 times: This item returns to your item tray and transforms into Diamond Hands. Then you will gain 1 Champion Duplicator and 15 gold.
- Diamond Hands: Once per combat at 66% and 33% Health, gain 1 gold and immunity for 2 seconds.
- Philosopher’s Stone: Refreshing your Shop adds a stack to Philosopher's Stone. Each Shop refresh has a chance to copy the holder and consume all stacks. More expensive champions are harder to copy.
Like everything discussed in this article, specific numbers are bound to change to accommodate balance; but the premise behind these items (i.e. sit on a pile of gold to make your team stronger in different ways) will remain the same.
Idas: Dragon, Shimmerscale, Guardian
What’s a pile of gold without a Dragon to sit on it? With the Dragon trait active for Idas, you’ll instantly activate Shimmerscale 3, granting you access to one of the eight Shimmerscale items! Idas doesn't come cheap though—as a tier 4 unit, she costs 8 gold, but her ability makes her worth the price! Idas treasures devotion most of all; the accumulation of wealth is just another way to gain it.
Her ability, Retaliation, hardens her scales, briefly reducing all incoming damage by a flat amount. She then roars, healing for a large chunk of health and granting her allies a shield for 5 seconds. The shield grants attack speed while it holds.
Playing Idas is core to the econ based strategy of Shimmerscale players, who may lack frontline due to their greedy habits that prevent them from starring up units via rolling. That’s where Idas can save the day and earn (or buy) the devotion she deserves!
Mirage
Always changing, never the same, Mirage continues the beloved trend that Mutant from Gizmos & Gadgets created as a high-variance trait, rotating between one of seven different traits each game.
Mirage trait breakpoints are 2,4,6,8 regardless of their variation. Some of these variations may look familiar, others are just a Mirage of what they used to be:
- Electric Overload: Attacking or being hit by an attack has a chance (increasing at trait breakpoints) to deal a percentage of maximum health magic damage to adjacent enemies.
- Warlord’s Honor: Mirage units have bonus Health and Ability Power increasing at trait breakpoints. Each victorious combat they participate in increases the bonus by 10%, stacking up to 5 times
- Dawnbringer’s Determination: The first time Mirage units drop below 50% health, they rapidly heal for a portion of their maximum health, increasing at trait breakpoints.
- Duelist’s Dexterity: Duelists gain bonus Move Speed. Duelists' attacks grant stacking Attack Speed increasing at trait breakpoints. up to 8 stacks.
- Spellsword’s Enchantment: Each player combat, Mirage units gain Ability Power per attack that increases at trait breakpoints.
- Executioner’s Edge: Mirage units attacks and spells critically strike units below a health threshold that increases at trait breakpoints.
- Pirate’s Greed: After each player combat, gain a treasure chest that contains gold and sometimes other loot.
Playing the true flex trait, look to get these units:
- Leona: Tier 1 Guardian
- Yone: Tier 2 Warrior
- Nunu: Tier 3 Cavalier
- Daeja: Tier 4, 8-cost Dragon
- Yasuo: Tier 5 Warrior, Dragonmancer
Daeja: Dragon, Mirage
Daeja was once a part of another, Vhu; their bond unbreakable—until it, well, broke. Locals tell the tale of Vhu being lost to strange dimensional rifts, portals of some sort—now how about that?
Annnnnnnyyywayyyys, Daeja isn’t just the ancient Dragon of the Mirage, she also commands the wind with her ability, Windblast, which sends a blast of wind toward the largest group of enemies dealing magic damage and causes Daeja's attacks to launch three barrages each attack for 5 seconds.
Daeja can be your carry, but her additional passive also allows her to support any other sources of magic damage. Daeja’s attacks apply on hit magic damage that reduce her foe’s magic resistance, allowing her and any other magic damage dealers to dish out more and more damage as the fight progresses.
Jade
So serene, so stoic, and… kinda jaded—I mean Karma is a bit uptight for a 1-cost, just saying—Jade units summon Jade Statues that grow in power the more Jade units you have active.
And what do those statues do? Well, it depends on your devotion to the inhabitants of the Jade isles. At three Jade, you get a Jade Statue, getting one more at 6, and a third at 9, and a fourth at 12. Jade Statues empower units adjacent to where you place them. And as you go deeper into serenity the statues imbue your allies with more power! Oh, I almost forgot, statues will also EXPLODE upon death, dealingmagic damage based on a portion of their maximum health. So much for calm and serene!
Here’s your statue sculpting crew:
- Karma: Tier 1 Dragonmancer
- Taric: Tier 1 Bruiser
- Ashe: Tier 2 Dragonmancer, Swiftshot
- Gnar: Tier 2 Shapeshifter
- Anivia: Tier 3 Legend, Evoker
- Neeko: Tier 4 Shapeshifter
- Shi Oh Yu: Tier 4, 8-cost Dragon, Mystic
- Soraka: Tier 5 Starcaller
Soraka: Jade, Starcaller
You thought I was going to talk about Shi Oh Yu here didn’t you? Well, the Jade Dragon is really cool (pun intended), with their Jade fighting techniques and unique attack sequence that has them rotate through different forms of damage and CC, but I have to save some surprises for later! Instead, we’re going to learn about Soraka!
Soraka’s ability, Starfall, calls down a shower of shooting stars that heal your allies each time a star falls upon them. She also gains increased mana per attack whenever an ally is low on Health, allowing her to come in with the clutch cast more consistently!
This unicorn goat healer is the real GOAT, but here’s what REALLY makes Soraka exciting! Soraka’s Starcaller trait allows her to heal you! That’s right, not just your team. The first time Soraka casts her ability each combat, Soraka will heal your Tactician depending on her star level. A three-star Soraka will heal your Tactician 100 health—I mean she is the GOAT 5-cost.
Astral
Look to the stars. What do you see? An Astral shop? Oh, yippee!
With Astral in play, every 5th shop will grant you an Astral Orb and have a greatly increased chance to contain Astral champions, making it our first reroll comp with a true pity mechanic for the low-rollers among us. By dedicating yourself to the stars and running more Astral champions, you’ll get even better rewards from those orbs! But in addition to all this, Astral grants your team bonus ability power that increases at 3,6, and 9 Astral.
Astral brings the joy of starring units up alongside the exciting highs of cracking loot orbs. And now, let’s see who can be found amongst these stars:
- Nidalee: Tier 1 Shapeshifter
- Skarner: Tier 1 Bruiser
- Vladimir: Tier 1 Mage
- Nami: Tier 2 Mage, Mystic
- Illaoi: Tier 3 Bruiser
- Varus: Tier 3 Swiftshot
- Aurelion Sol: Tier 5, 10-cost Evoker Dragon
Expecting a section on Aurelion Sol next? Well check out our Mechanic Overview article for a look at what the Star Forger is up to in TFT!
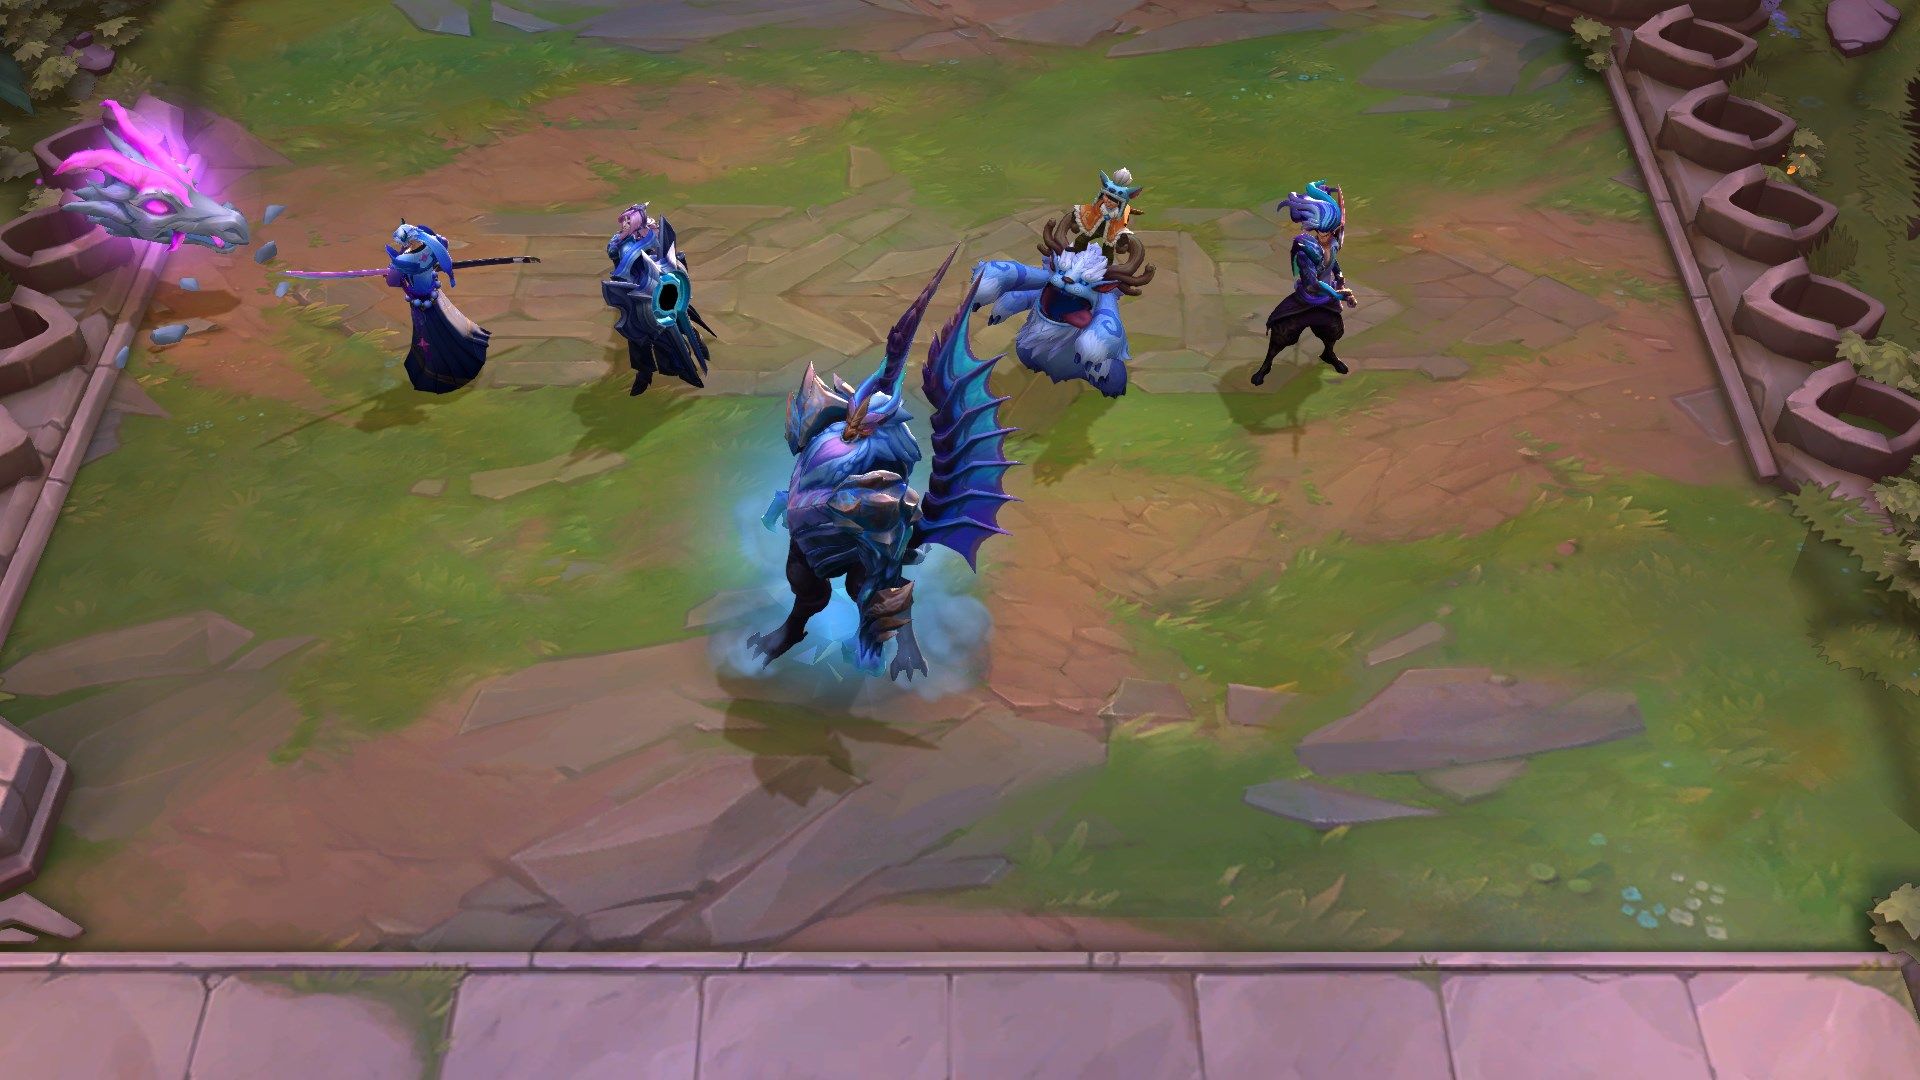
Ragewing
Do you ever get so mad that after you cast your spell you become Enraged for 4 seconds, gaining a ton of attack speed and omnivamp? Yeah, me neither. But Ragewings sure do! Ragewing units don’t use mana; instead, they generate Rage, which works like mana in that it will allow them to cast their spell when the bar gets full, but afterwards it will Enrage the champion, giving them the buff described above and preventing them from gaining Rage during the 4 seconds.
You can add to the Ragewing attack speed and omnivamp buff at 3, 6, and 9 Ragewing.
And here’s who’s adding to the Rage:
- Senna: Tier 1 Cannoneer
- Sett: Tier 1 Dragonmancer
- Kayn: Tier 2 Assassin, Shimmerscale
- Shen: Tier 2 Bruiser, Warrior
- Swain: Tier 3 Dragonmancer, Shapeshifter
- Hecarim: Tier 4 Cavalier
- Xayah: Tier 4 Swiftshot
- Shyvana: Tier 5, 10-cost Dragon, Shapeshifter
Notice that Shapeshifters are back! Shapeshifters' first spell transforms them, altering their next spell. Check out our detailed breakdown on one of them, Shyvana, in our Mechanics Overview article! Ragewing champions get tons of attack speed from their Enraged buff after their cast, so be sure to give your carries some damage to make the fury of attacks hurt even more!
Trainer
Do you want to be the very best—like no one ever was? Then travel across the Dragonlands! You won’t have to search far and wide, cause Nomsy is a pretty wide Dragon. And if training Nomsy is your cause, look no further than running the Trainer trait! Trainers summon Nomsy to fight alongside them. After combat, each Trainer feeds the Dragon a treat for each of their star levels, upgrading Nomsy’s abilities. Leveling up from eating treats also grants bonus stats.
Here’s a list of those who have training as their cause:
- Heimerdinger: Tier 1 Mage
- Tristana: Tier 2 Cannoneer
- Lulu: Tier 3 Evoker, Mystic
Unlike some of our past summon traits, Trainer provides the core units for a scaling reroll composition! Stay at level 6, slow rolling (never rolling below 50 gold) to star up Tristana, who will be your main carry. Along the way you can look for Jinx to activate two Cannoneer, which will make every fifth attack from a Cannoneer a cannon shot that deals extra physical damage in an explosion around the target! Then you can look to add two more Mages, another Mystic, or even more Cannoneers to amplify your Tristana even more! And while you’re leveling up your Trainers, they’ll be training your Nomsy to become the best there ever was!
Guild
Who needs dragons when you have skills like these?Guild members also receive a unique trait bonus that increases with each active guild member. This bonus applies to all allies, but Guild members gain double the benefit. Here are the Guild members and the trait bonus they bring:
- Sejuani: Tier 1 Cavalier + Health
- Twitch: Tier 2 Swiftshot +Attack Speed
- Ryze: Tier 3 Mage + Ability Power
- Talon: Tier 4 Assassin + Attack Damage
- Bard: Tier 5 Bard, Mystic + Mana per attack
- Guild Emblem: + Omnivamp
In most cases you can look to put your AP items on Ryze and your AD ones on Talon, and from there you can choose whether to add more Mages to the movement, or field more talented Assassins to lend a hand. Remember, you have value, you have the skills—those Dragons just own the means of production, and it’s time we changed that.
One more way to change that is by splashing Scalescorn into your Guild comp, with Lilia and Diana to activate Mage, Cavalier, and Assassin. When running Scalescorn without a Dragon on your team, Scalescorn champions deal bonus magic damage and take reduced damage from enemies with more than 2500 Health.
You see? Even though we’re in the Dragonlands, you don’t have to field any Dragons to find success. Okay, time to talk about the real star of the Guild!
Bard: Guild Mystic Bard
Bard is truly the leader of the Guild Bardty. He’s our first champion whose ability impacts your roll odds. Whenever one of your units dances, they have a 10% chance to generate a Doot (does not work on PvE rounds). To get your units to dance, just win! Oh, and Bard always generates a Doot when he dances. Picking up a Doot permanently increases your odds of seeing tier 3, 4 or 5 champions in the shop by 1% each, allowing you to hit high cost units consistently at level 7!
Bard’s ability, Unstable Portal, sends magical energy toward the largest group of enemies. On impact all enemies within are stunned, causing them to take increased damage during their stun duration. If this hits at least one unit, Bard dances in celebration, creating a Doot!
Dragonmancer
What’s a fantasy landscape without a chosen one narrative? Well, with Dragonmancer you can pick your chosen one from amongst your Dragonmancer units. Each round you can gift the Dragon Blessing to a Dragonmancer unit, or someone with a Dragonmancer Emblem. At the start of the next round you can select a different unit as your Dragonmancer Hero by reusing the Dragon Blessing consumable, but you can also keep the same one!
The Dragonmancer Hero gains massively increased health and ability power at 3,6, and 9 Dragonmancer. These stats are increased by 5% per star level of your Dragonmancers.
Dragonmancer allows you to flexibly choose your carry round after round. For those experts in the Dragonlands, try altering who your Dragonmancer Hero is based on your next opponent. For instance, if your next foe is running Mystic, you’d better choose a hero that deals physical damage to bypass all that magic resistance.
And here’s a list of who could be heroes:
- Karma: Tier 1 Jade
- Sett: Tier 1 Ragewing
- Ashe: Tier 2 Jade Swiftshot
- Lee Sin: Tier 3 Tempest
- Swain: Ragewing Shapeshifter
- Volibear: Tier 3 Shimmerscale Legend
- Yasuo: Tier 5 Mirage Warrior
Yasuo: Dragonmancer, Mirage, Warrior
On your board he can be your Angel, or on your opponent’s, your Devil. Yasuo’s ability, Sweeping Blade, allows him to dash through his target and shield himself for one second, slashing enemies at the end of the dash based on his attack damage. Every third cast makes Yasuo’s slash deal triple damage, hitting a larger area around him and knocking up enemies for two seconds. If this hits only the last enemy left alive, Yasuo repeatedly slashes them until they die.
Give Yasuo a Blue Buff to keep those casts going, and try to provide some protection for him so he can activate his finisher, much like his Chibi counterpart!
That’s all there is for now! Hopefully this gets you as excited as we are to create your own comps along your journey through the Dragonlands. But, if it wasn’t enough, here’s a brief overview of literally everything in a handy dandy cheat sheet of traits and champs coming to Dragonlands!
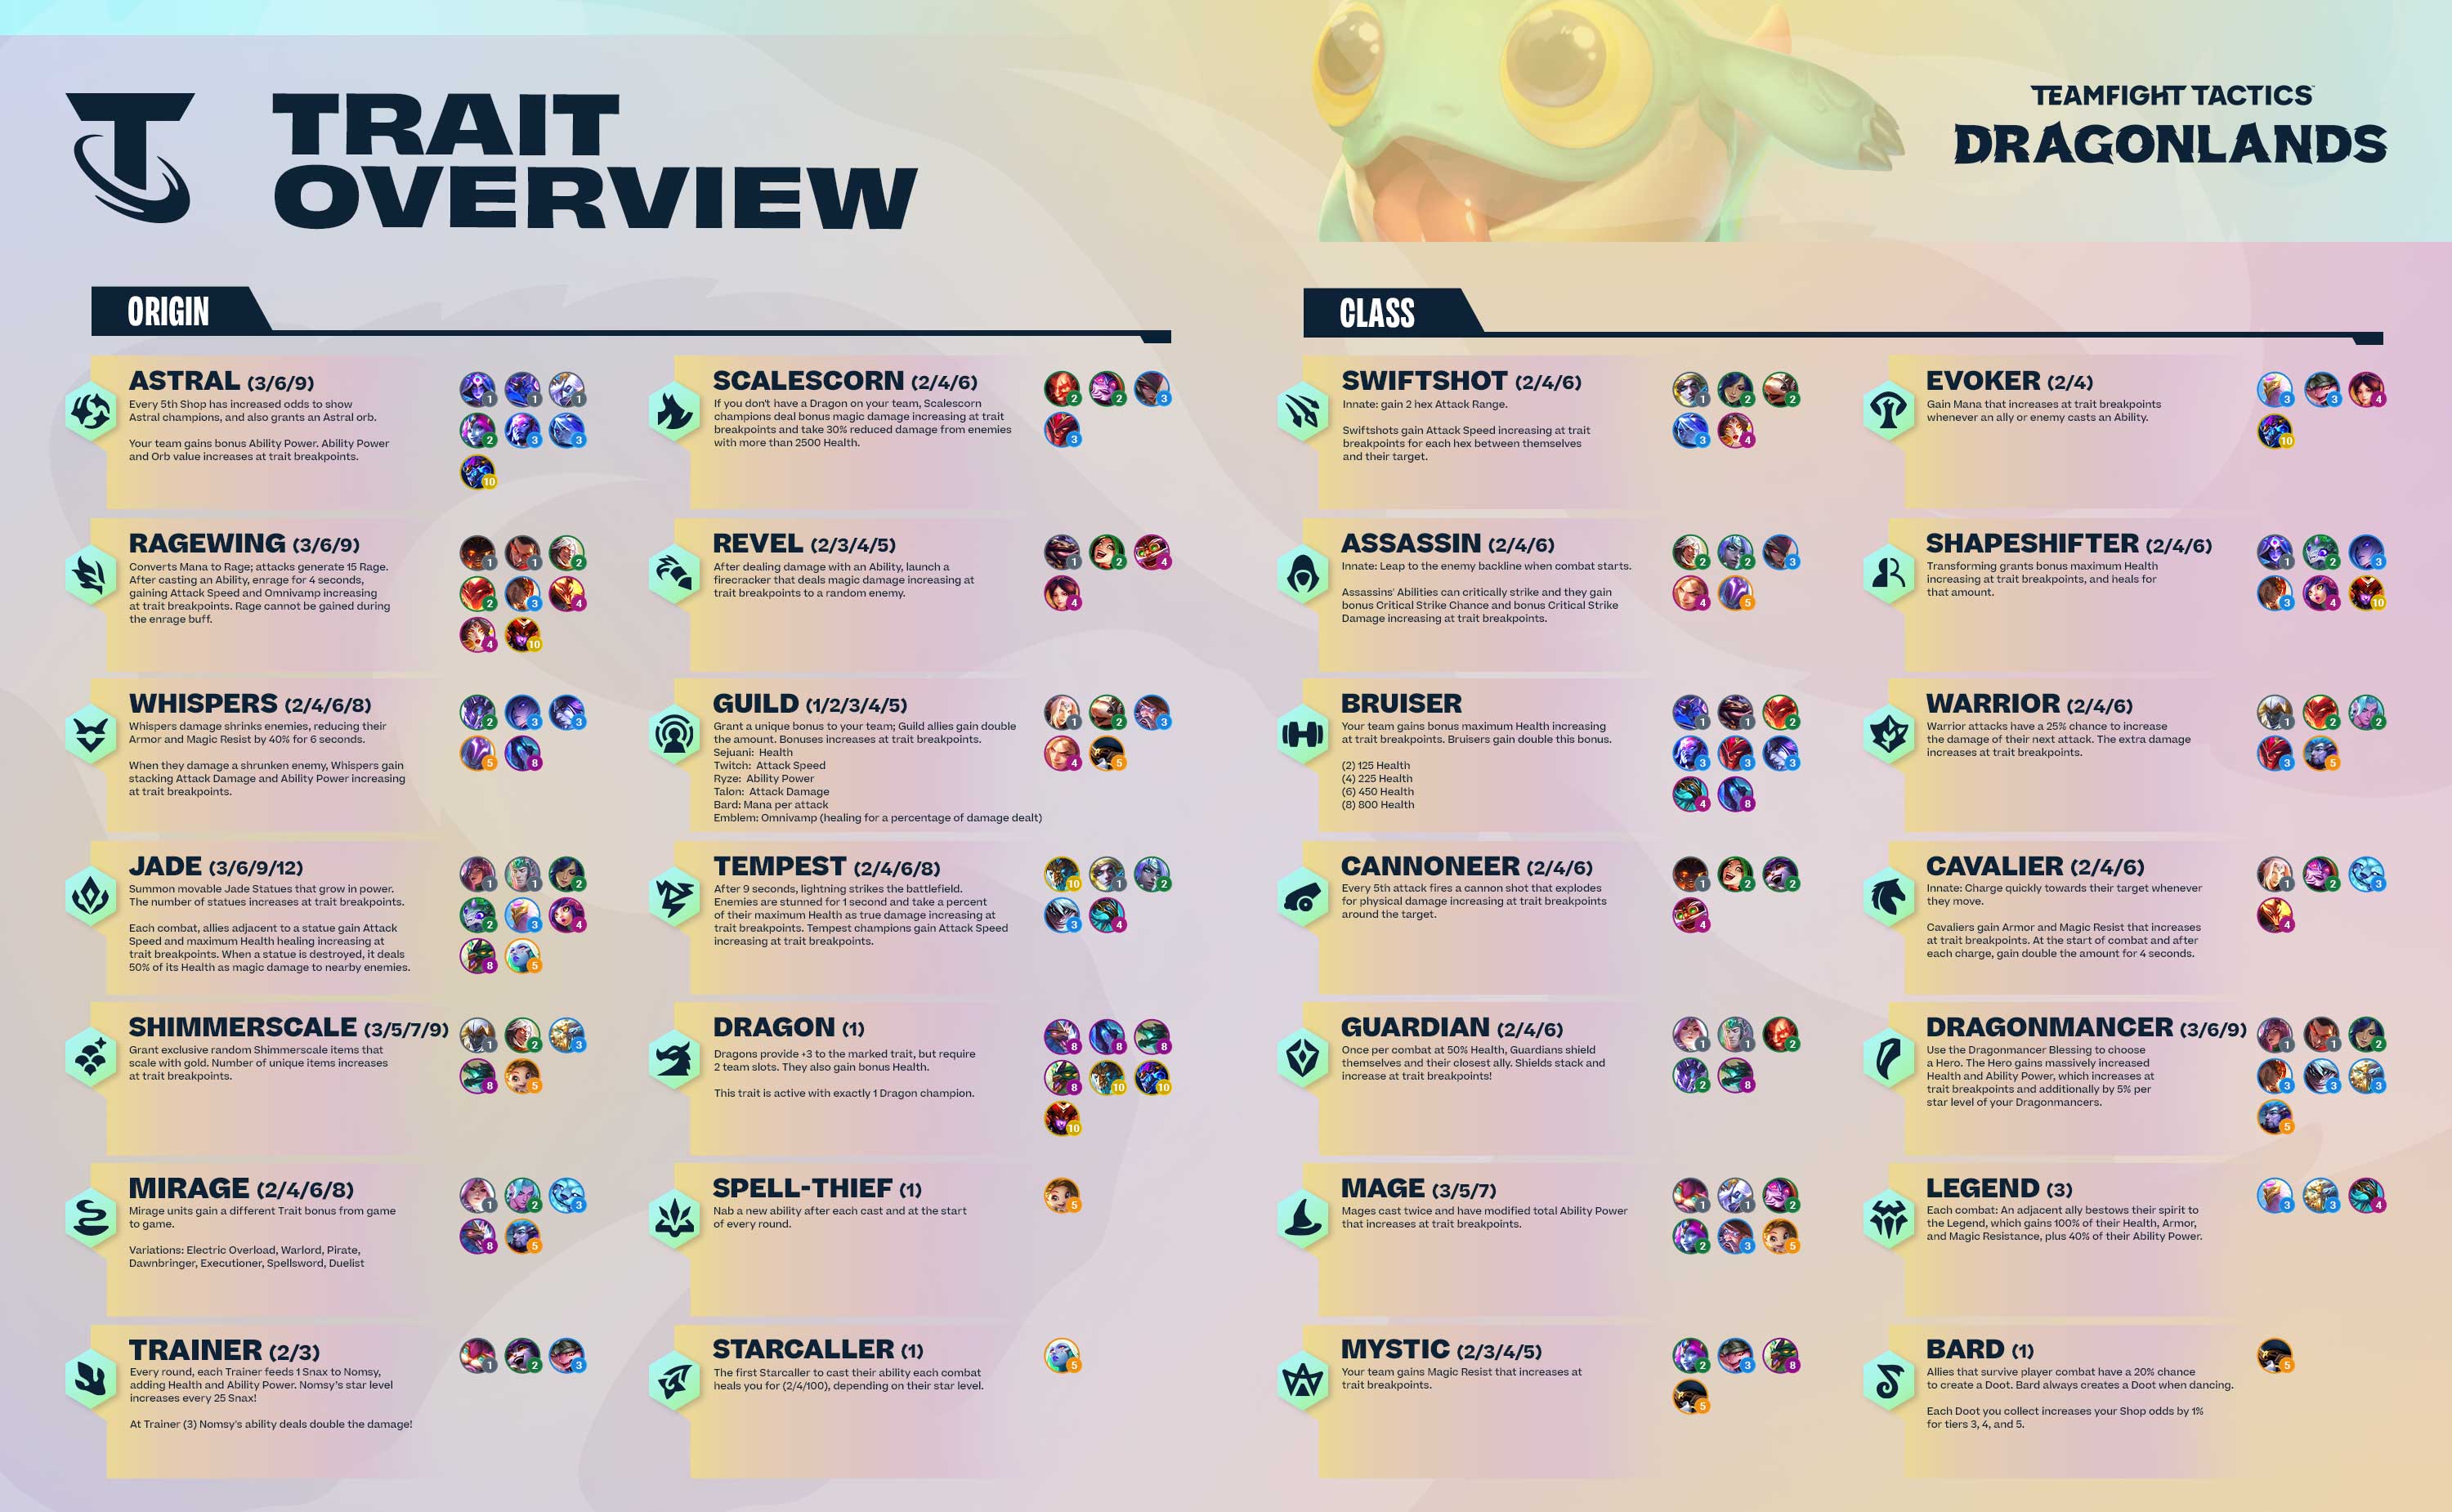
And here’s a high quality version for my high quality readers!
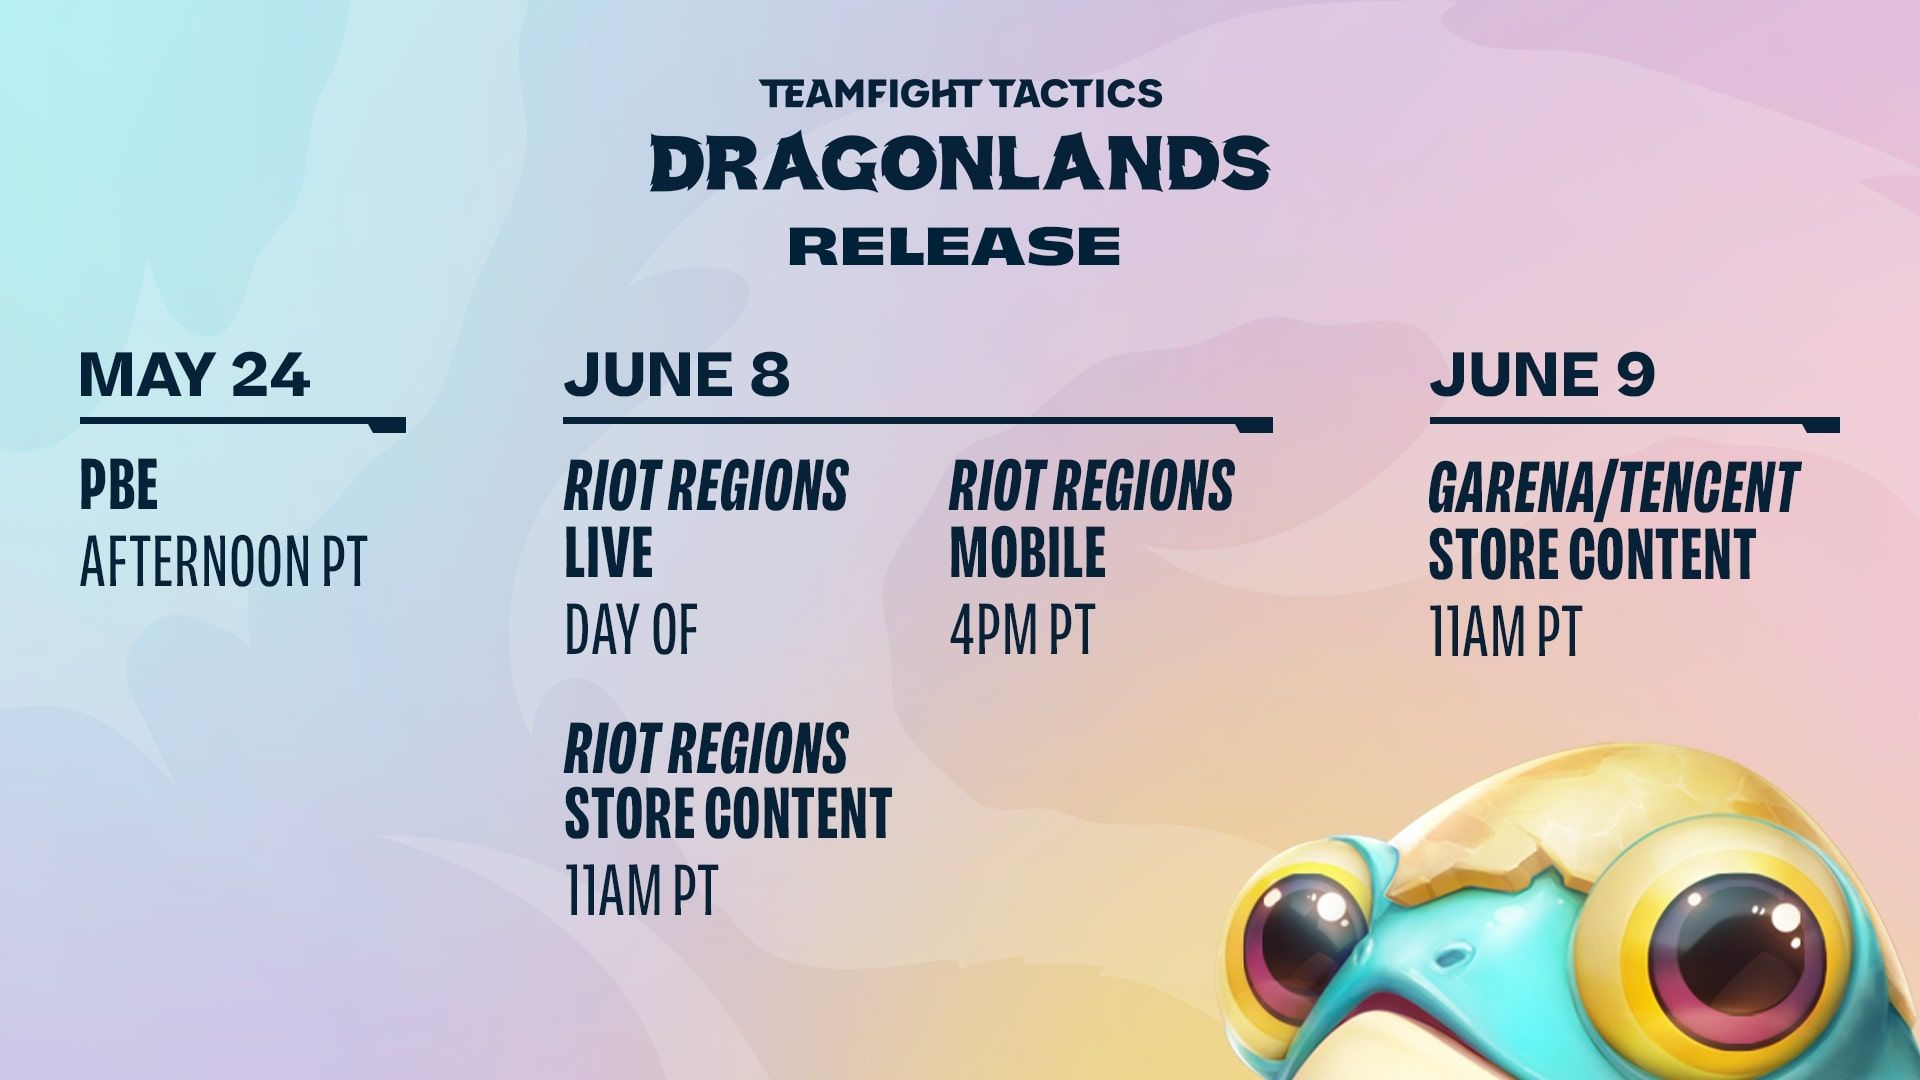
And that about covers it—well, not ALL of it. There’s still our Pass and More as well as our Set Mechanic Overview articles for you to check out. Definitely do so when you get the chance, ‘cause I hear the author for those ones is insanely handsome and talented. Finally, I know it can be hard to keep all the dates for our release straight amidst your busy schedule, so we had an artist mock this up for you to help!